 Save
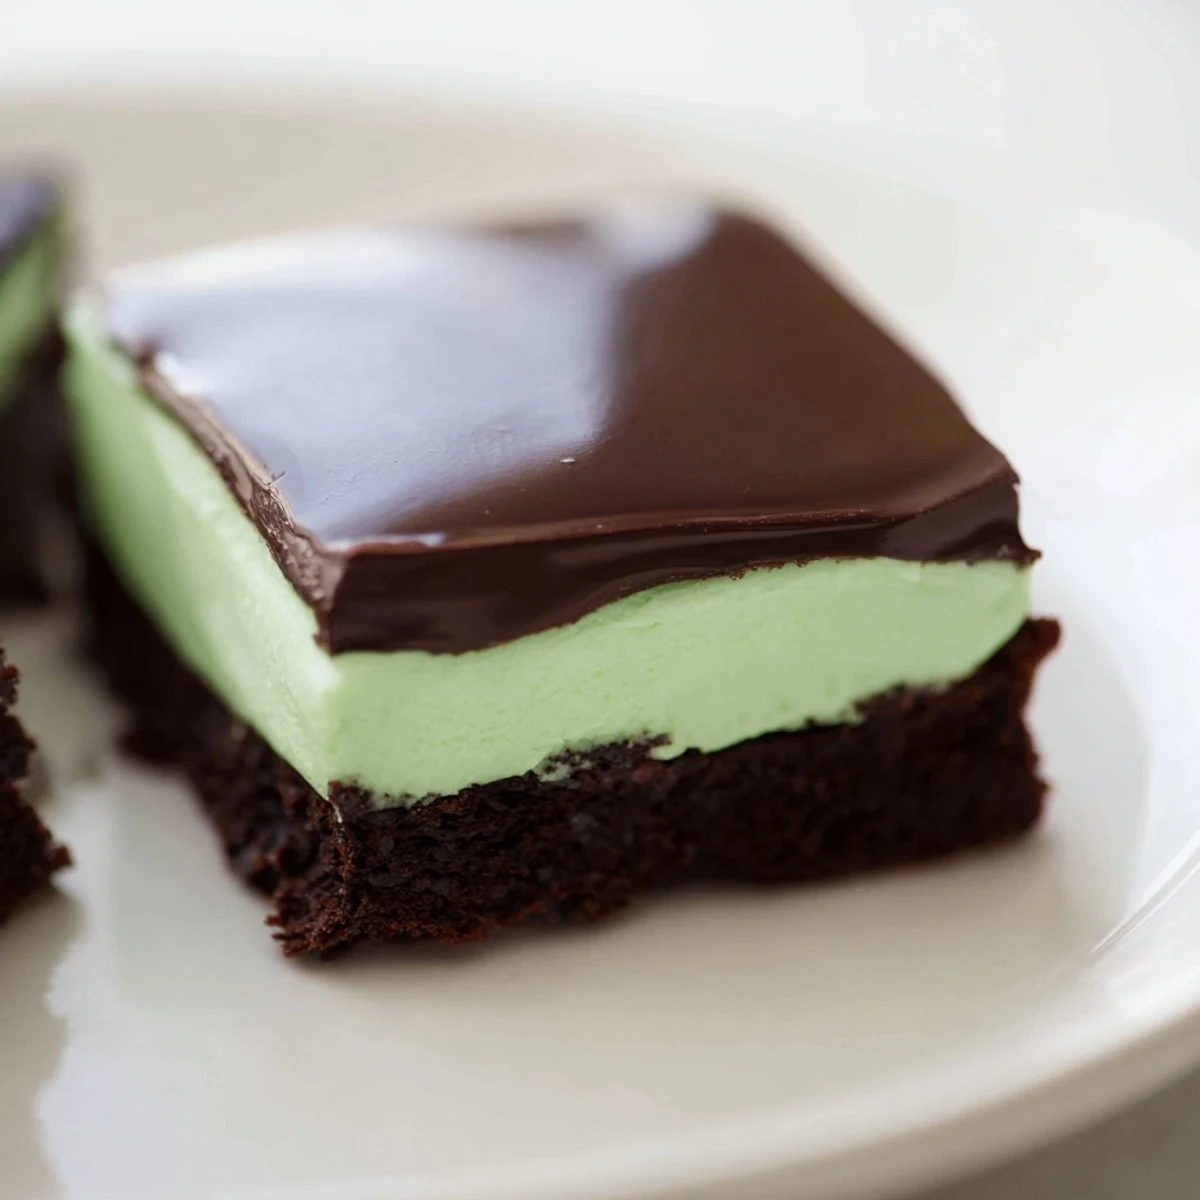
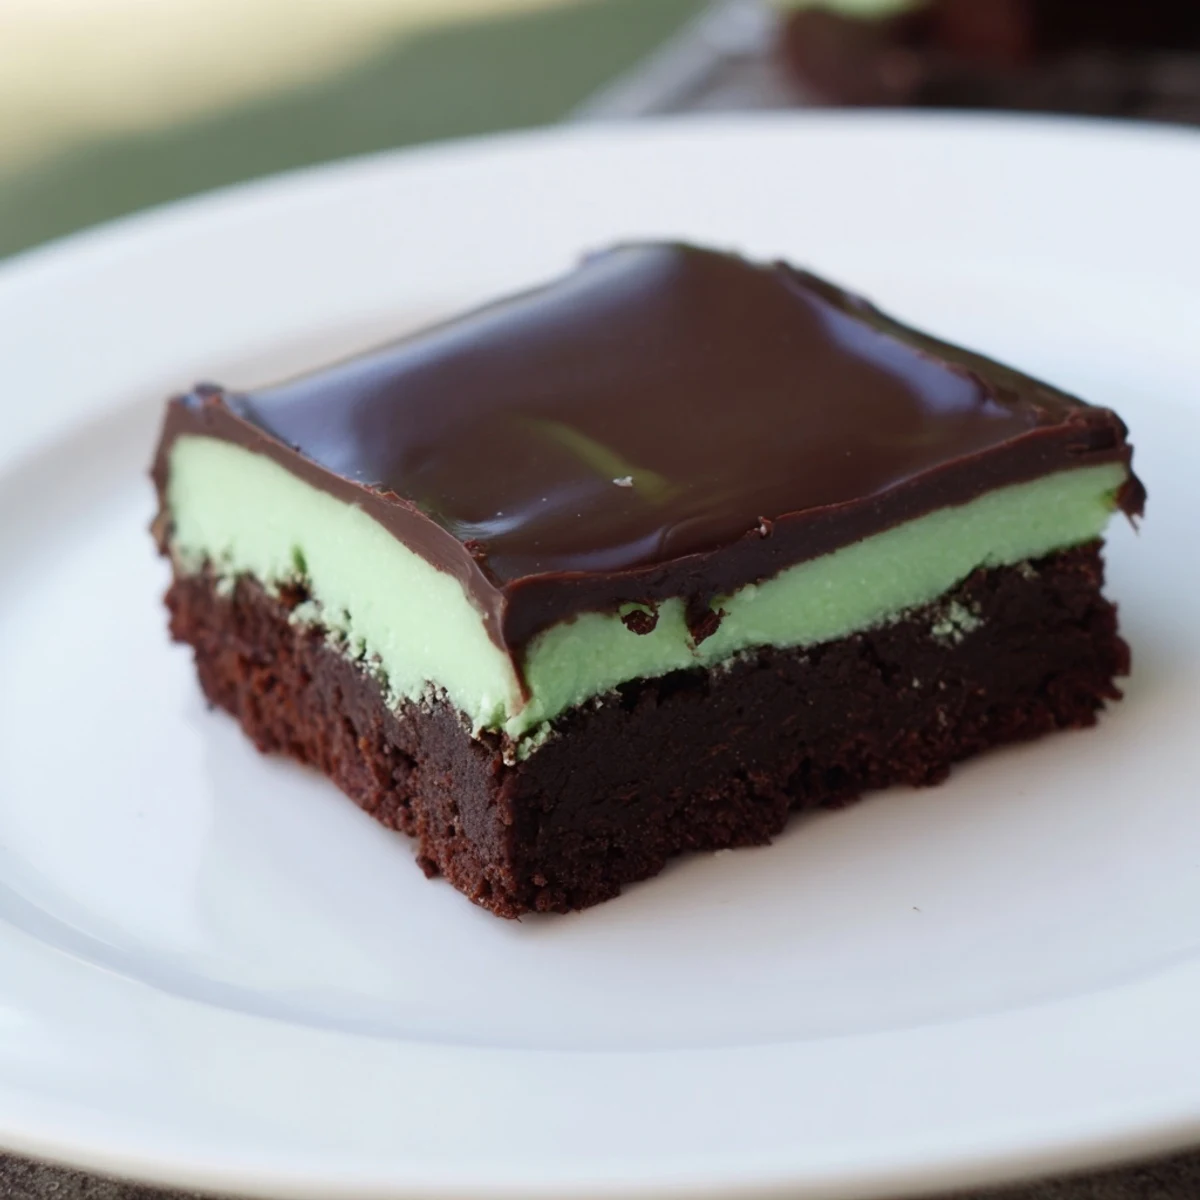
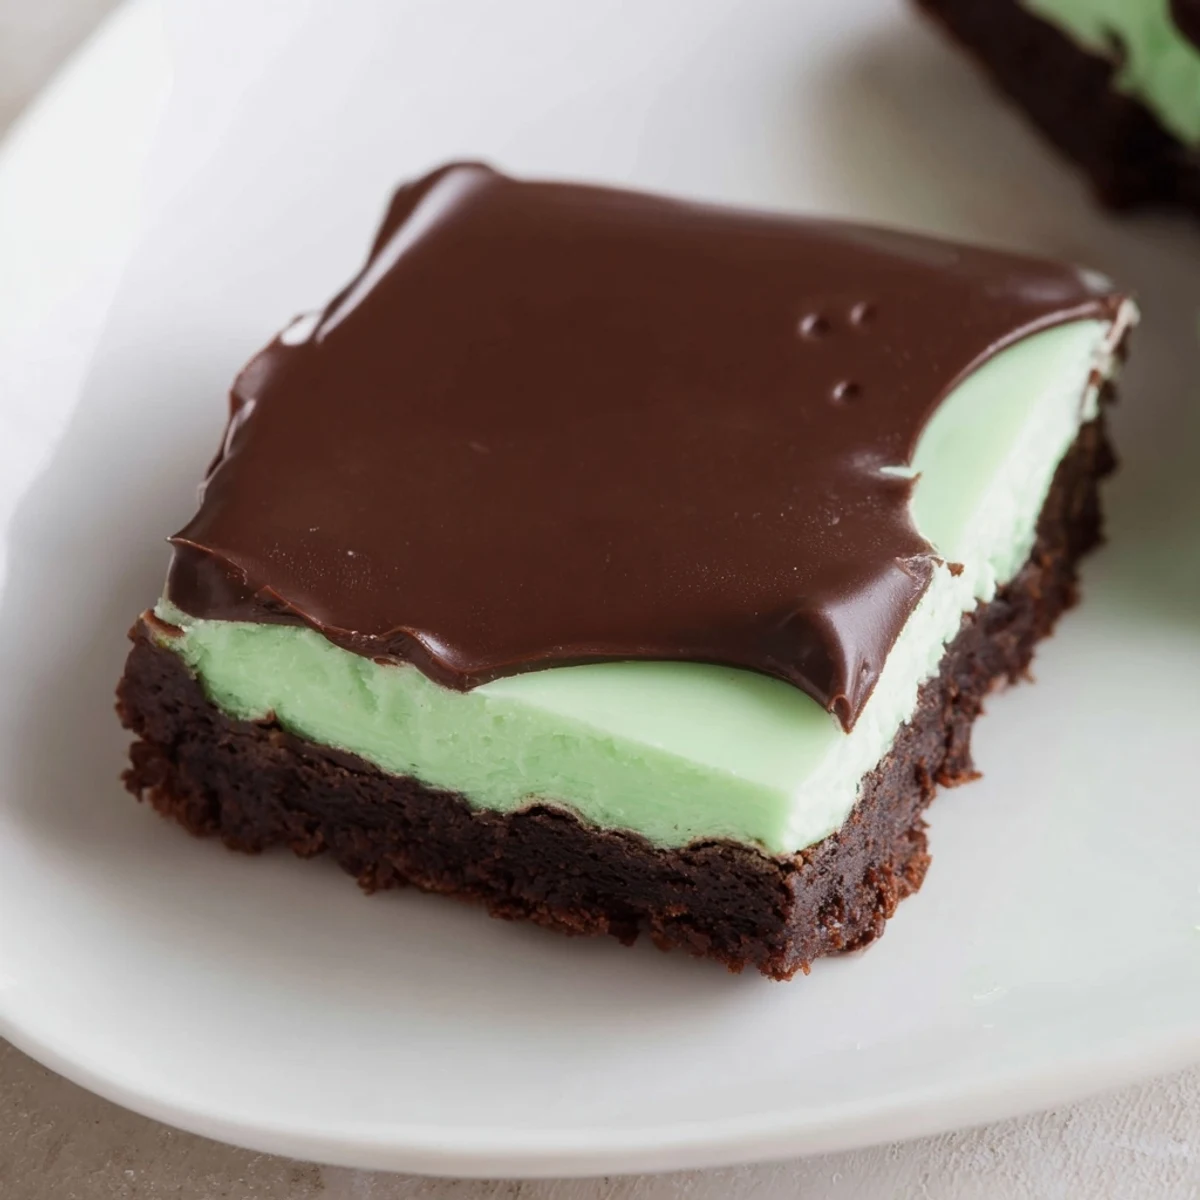
Save These shamrock mint brownies feature a rich and fudgy base infused with a hint of cool mint. A smooth, creamy mint layer rests atop the base, crowned by a glossy chocolate ganache. The combination of semi-sweet chocolate, peppermint extract, and creamy textures creates a decadent dessert ideal for celebrating special occasions or satisfying sweet cravings. Preparation includes baking, chilling, and layering to achieve distinct flavors and textures. Store chilled for freshness and enjoy portioned squares with cold milk or Irish coffee.
The smell of melting chocolate always pulls me into the kitchen, like some kind of gravity I cannot resist. I remember one rainy Sunday when I decided to experiment with adding mint to brownies on a whim. The first batch came out of the oven looking perfectly ordinary, but that mint layer turned them into something people could not stop talking about. Now they are my go-to whenever I need something that feels like celebration.
My friend Sarah tasted these at my annual St. Patricks Day gathering a few years back and immediately demanded the recipe. She texted me the next day saying she had already made two batches for her office. Something about the green layer makes people smile before they even take a bite.
Ingredients
- Unsalted butter: I use room temperature butter for even melting and better texture in every layer
- Semi sweet chocolate: Choose a good quality baking chocolate since it is the star of the show
- Granulated sugar: Creates that crackly top we all love on brownies
- Large eggs: Room temperature eggs incorporate better into the batter
- Vanilla extract: Pure vanilla makes a noticeable difference in depth of flavor
- All purpose flour: Do not pack the flour when measuring for fudgy results
- Unsweetened cocoa powder: Sifting prevents lumps and ensures smooth distribution
- Salt: A tiny amount intensifies the chocolate flavor
- Powdered sugar: Sifting twice makes the mint layer silky smooth
- Whole milk: Adjust to get the perfect spreadable consistency
- Peppermint extract: Start with less and add more since it is quite potent
- Green food coloring: Gel coloring gives the most vibrant hue without thinning the frosting
- Heavy cream: Warm cream creates the silkiest ganache texture
Instructions
- Melt the chocolate base:
- Melt butter and chocolate over very low heat, stirring constantly until glossy and smooth. The mixture should be warm but never hot enough to seize.
- Build the batter:
- Whisk sugar into the chocolate mixture until it disappears, then add eggs one at a time. Stir in vanilla until the batter looks velvety and ribbons slightly.
- Fold in the dry ingredients:
- Sift flour, cocoa, and salt directly into the bowl, then fold gently until no dry streaks remain. Overmixing makes tough brownies.
- Bake to perfect fudginess:
- Spread batter evenly in your prepared pan and bake until a toothpick comes out with moist crumbs. The center should still feel slightly soft.
- Create the mint cream:
- Beat softened butter until creamy, then gradually add powdered sugar, milk, and peppermint extract. Add food coloring drop by drop until you reach a lovely mint green.
- Layer and chill:
- Spread the mint filling evenly over cooled brownies, then refrigerate until firm. This step is crucial for clean layers.
- Make the glossy ganache:
- Heat cream until tiny bubbles form around the edges, then pour over chopped chocolate. Let it sit for two minutes before stirring into liquid silk.
- Finish and set:
- Pour ganache over the mint layer and tilt to spread. Chill until completely set before cutting.
- Clean cutting:
- Run your knife under hot water and wipe between each cut for those picture perfect edges.
 Save
Save Last Christmas my grandmother admitted she is usually not a mint person, but she ate three of these. That is when I knew this recipe was something special.
Making Ahead
I have learned these brownies actually taste better after sitting overnight in the refrigerator. The flavors meld together and the texture becomes even more fudgy. You can make the entire recipe up to two days before serving, just keep them well covered.
Texture Secrets
Underbaking slightly is the key to that professional fudgy texture people love. The toothpick test should show moist crumbs, not clean batter. I set my timer for the minimum time and check from there.
Serving Suggestions
These brownies are rich enough that small squares satisfy completely. I serve them at room temperature for the softest texture.
- A dusting of gold or green edible sugar makes them extra festive
- Try adding crushed candy canes on top for holiday variation
- Cutting with a warm knife gives the cleanest edges every time
 Save
Save Every time I make these brownies, someone asks for the recipe. That is the best kind of cooking success.
Recipe FAQs
- → How do I ensure the brownies stay fudgy?
-
Use the correct baking time and avoid overmixing the batter. Allow the brownies to cool fully before adding any layers.
- → Can I adjust the mint flavor intensity?
-
Add an extra 1/4 teaspoon of peppermint extract to the cream layer for a stronger mint presence without overwhelming the balance.
- → What type of chocolate works best for ganache?
-
Semi-sweet chocolate creates a balanced sweetness, but using dark chocolate will result in a less sweet, richer ganache.
- → How long should the brownies chill before serving?
-
Chill for at least one hour after spreading the ganache to allow layers to set properly and ease clean cutting.
- → Can these be stored for later?
-
Store the brownies in an airtight container in the refrigerator for up to five days to maintain freshness.