Save
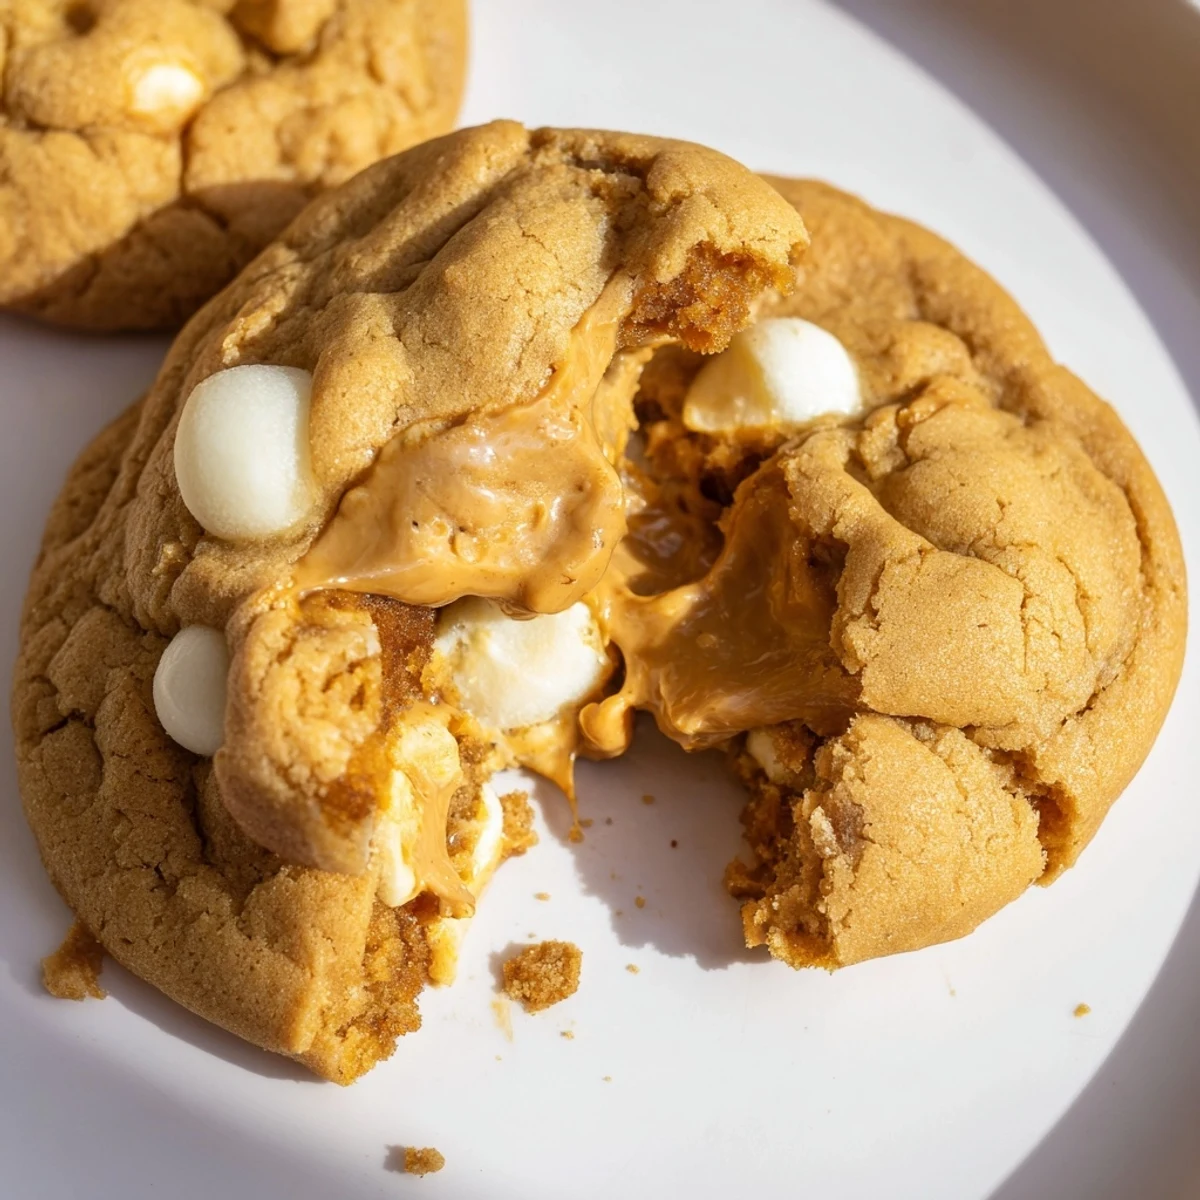
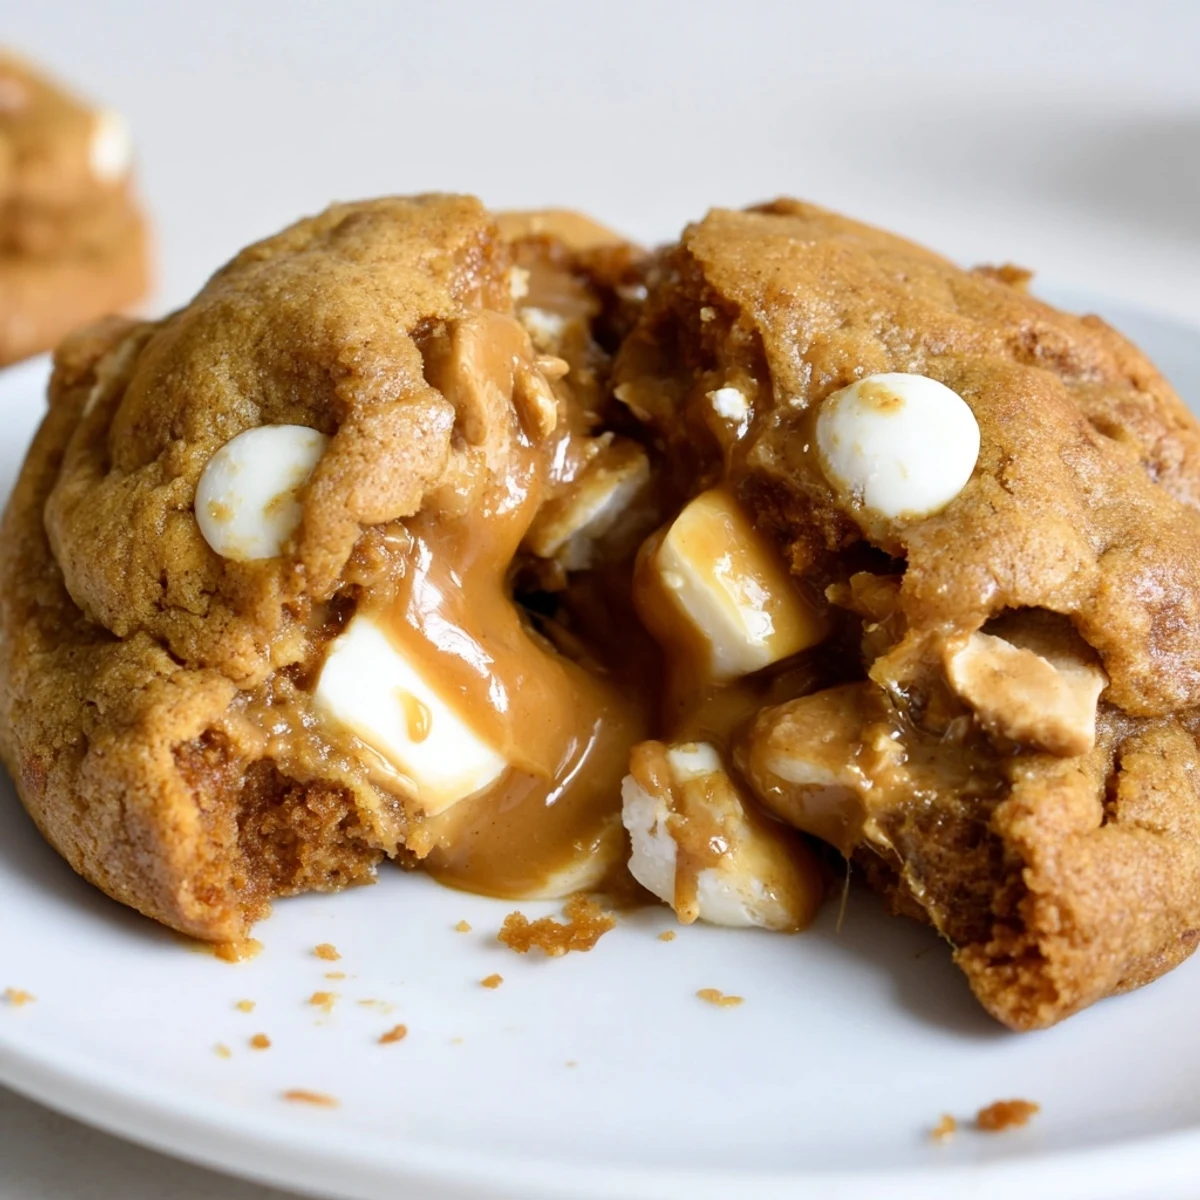
Save These warm, indulgent cookies feature a surprise molten Biscoff butter center that creates the ultimate lava effect. The dough combines buttery richness with white chocolate chips and crushed Biscoff cookies, creating layers of caramelized cookie butter flavor in every bite.
Freezing the Biscoff filling before wrapping it in dough ensures that gooey, molten center when baked. The key is achieving golden edges while keeping centers slightly underbaked for that signature lava texture. Best served warm for maximum melty goodness.
Prep involves scooping and freezing Biscoff portions, creaming butter with sugars until fluffy, then folding in white chocolate and crushed cookies. Each dough ball gets wrapped around a frozen Biscoff center, chilled briefly, then baked until edges turn golden brown.
The first time I made these, my kitchen smelled like caramelized sugar and warm spices for hours. My roommate kept wandering in, asking if I was making some fancy European pastry. Nope, just Biscoff and butter doing their absolute best work together.
I brought a batch to a friend's dinner party last winter, and honestly, people went quiet when they bit into them. That moment when the warm Biscoff center starts oozing out? Pure magic. Now they request them for every gathering.
Ingredients
- Biscoff spread: Freezing it first is nonnegotiable. Learned this the messy way when my first batch turned into Biscoff soup in the oven.
- Unsalted butter: Soften it properly, not melted. You want that light and fluffy creamed texture for the best cookie foundation.
- Light brown sugar: Adds moisture and that gorgeous caramel flavor deep in the dough.
- White chocolate chips: They pair beautifully with Biscoff, but Ive used dark chocolate in a pinch and nobody complained.
- Crushed Biscoff cookies: Texture contrast is everything here. Dont skip this step.
Instructions
- Prepare the Biscoff centers:
- Scoop heaping teaspoon portions onto parchment and freeze until solid. This takes about 30 minutes but saves you from a lava disaster later.
- Cream your butter and sugars:
- Beat that butter and sugar mixture until its pale and fluffy. Trust me, the extra minute of mixing makes a difference in texture.
- Bring it together:
- Add the egg and vanilla, then gradually incorporate your dry ingredients until just combined. Fold in those white chocolate chips and crushed cookies last.
- Stuff and seal:
- Flatten each dough portion, pop a frozen Biscoff ball in the center, and wrap the dough around it completely. Pinch the edges tight so nothing escapes during baking.
- The chill factor:
- Refrigerate your stuffed cookies for 15 minutes before baking. This helps them hold their shape and develop those crispy edges we all love.
- Bake to perfection:
- Twelve minutes at 350°F gives you golden edges with slightly underdone centers. Let them rest on the hot sheet for 5 minutes, then transfer carefully.
 Save
Save My dad called me after trying these, genuinely asking what kind of wizardry was involved in making that center happen. Now he requests them for every holiday, claiming theyre his special treat. Funny how the simplest twists become the ones people remember most.
Making Ahead
You can freeze the stuffed dough balls for up to a month. Just bake them straight from the freezer, adding an extra minute or two to the baking time. Honestly, having fresh baked cookies on demand for unexpected guests is kind of a superpower.
Serving Ideas
A scoop of vanilla bean ice cream alongside these cookies creates the most perfect temperature contrast. The cold cream against that warm Biscoff center? Absolute heaven. Ive also crumbled them over vanilla frozen yogurt for a quick dessert hack.
Storage and Reheating
Keep them in an airtight container at room temperature for up to 3 days, though lets be honest, they rarely last that long. For that just baked experience, microwave each cookie for 10 to 15 seconds before serving. The Biscoff center gets all melty and wonderful again.
- Store with a piece of bread to keep them soft
- Avoid the refrigerator unless absolutely necessary
- Freeze extras if you somehow have any left over
 Save
Save Theres something deeply satisfying about breaking into a warm cookie and watching that golden center spill out. Hope these bring as much joy to your kitchen as they have to mine.
Recipe FAQs
- → Why freeze the Biscoff filling before baking?
-
Freezing the Biscoff spread creates solid centers that won't melt into the dough during baking. This ensures each cookie develops that signature molten lava effect when warmed, keeping the gooey filling contained until you bite into it.
- → Can I use milk or dark chocolate instead of white chocolate?
-
Absolutely! While white chocolate complements the caramelized notes of Biscoff beautifully, milk or dark chocolate chips work equally well. The darker chocolate adds a rich contrast to the sweet cookie butter filling.
- → How do I know when the cookies are done baking?
-
Look for golden brown edges while the centers appear slightly underdone and soft. This residual heat continues cooking the cookies as they cool, creating that perfect chewy texture with a molten Biscoff center.
- → Why chill the stuffed dough balls before baking?
-
Chilling for 15 minutes helps the cookies hold their shape during baking, preventing excessive spreading. This step ensures thicker, chewier cookies with distinct edges and that desirable lava center.
- → Can I make the dough ahead of time?
-
Yes! Prepare the stuffed dough balls and freeze them unbaked. When ready to enjoy, simply bake from frozen, adding an extra 1-2 minutes to the baking time. This way you always have fresh warm cookies on demand.
- → What's the best way to serve these for maximum effect?
-
Serve them warm, either fresh from the oven or briefly reheated in the microwave for 15-20 seconds. The warmth creates that irresistible molten lava flow. Pairing with vanilla ice cream creates an incredible temperature and flavor contrast.